
Let’s Encrypt has done a beautiful thing. They have made security certificates for use with SSL/TLS accessible to everyone, for FREE. Truly, truly awesome. They have some very convenient integration with many types of server that makes it not only convenient, but downright easy to obtain and use the certificates as well.
Unfortunately, SonicWall’s UTM firewalls do not make use of the various options for integration, and for those of us that crave proper security this can be a bit of a let down. The good news is, with a little extra legwork, we can use Let’s Encrypt to secure our communications for both web management, and the SSL-VPN.
There are a few things that need to be in place in order to achieve this:
1) We need a valid public domain
2) We need a DNS ‘A’ record that resolves to the public IP address of the SonicWall
3) We need the ability to add TXT records to our public DNS records
4)We need administrative access to the SonicWall
5) We need access to a Unix or Unix-like workstation, server, or similar device and permissions to use sudo to elevate privileges (please don’t log in as root, that’s not good practice)
I am not going to go into the process of obtaining a domain nor how to change DNS records, there are plenty of great tutorials out there already. Instead, we will focus solely on what we need to do for the SonicWall and Let’s Encrypt. This has been tested on firmware versions 6.5.0.2 and up, most recently on 6.5.4.5. That said, I am sure that this same process will work on Gen 5 units that are using the 5.9.x.x ( it had better be 5.9.1.13, or else you need to update!) line of firmware, but the menu’s will look different.
Enough prelude, let’s encrypt! (Sorry, that was terrible)
The first thing we need to do is generate a Certificate Signing Request (CSR) on the SonicWall. To do so, log in and navigate to Manage > Appliance > Certificates. At the bottom of the list of default trusted certificates, you will find the ![]() button. Hit that and you are presented with the CSR form.
button. Hit that and you are presented with the CSR form.
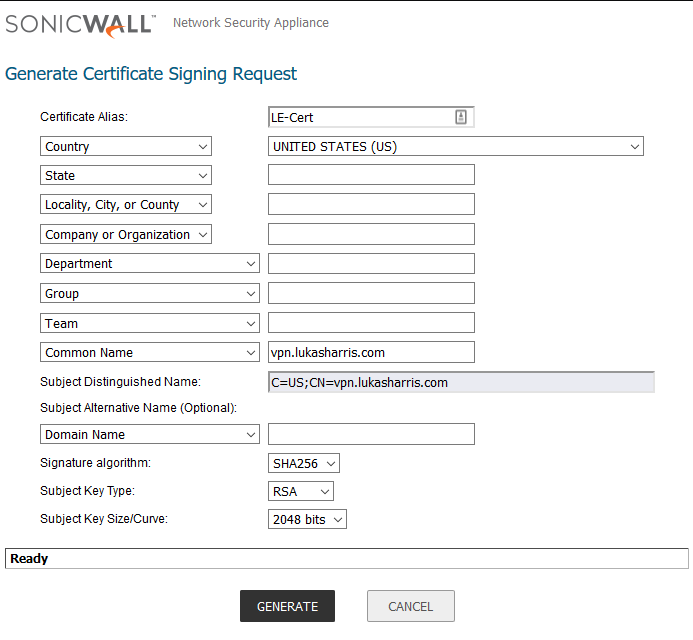
Get that all filled out, and make sure that the common name you enter matches the domain name you have configured to resolve to your SonicWall’s WAN IP. I strongly recommend that you do not use a Signature Algorithm less than SHA256, and the Subject Key Size/Curve should be no smaller than 2048 bits. Once you are ready, click generate at the bottom of the window. You will see a new entry at the top of the trusted certificate list. It can take a moment to generate the key (especially if you went bigger than 2048) so readjust your hat and then hit refresh in your browser.
You will know it is ready to go when the “Type” column says “Pending Request.” Folow the row to the far right of the page and click the download icon to download the .p10 file we will use with Let’s Encrypt to get this request signed. Click “Export” on the pop-up, and save this file somewhere secure.

That is all for that SonicWall at this point, now we need to get this certificate signed and official. To do that, we will be using certbot, an script published by Let’s Encrypt that will allow us to submit the CSR for signing. I chose to do this on Ubuntu 18.04, but you can use your Unix or Unix-like system of choice. Make sure you can get to the .p10 file that was created in the last steps.
To install certbot onto Ubuntu, run the following:
sudo apt install certbot -yAn issue that many run into when trying this process is that the default way certbot wants to verify ownership of the domain and server is by either:
1) starting up a standalone webserver that it can install the certificate to
2) placing files into the common webroot directory for authentication.
Following that, certbot wants to be entirely too helpful, and will actually try to install and configure the certificate for use on the server you are running certbot on. This is a problem, seeing as the SonicWall can do none of these things.
Never fear, I read the certbot manual so you don’t need to.
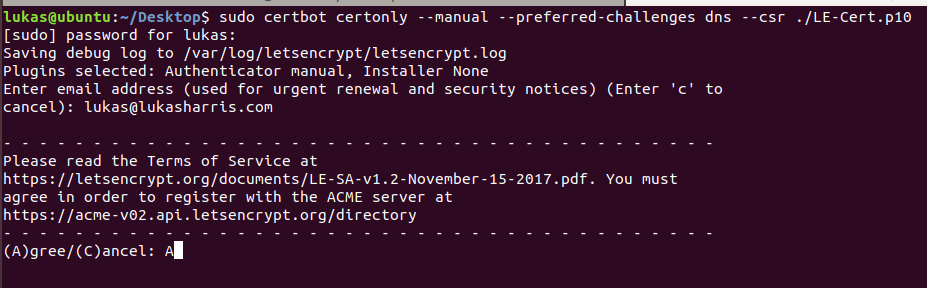
We are going to run certbot in ‘certonly’ mode, which bypasses the attempted installation. In addition to that, we are going to use ACME validation through a DNS TXT record, rather than using a web server. Lastly, we already have a certificate signing request, so we can tell certbot to use it rather than generating a new one on the Ubuntu machine we are using. The command will look like this:
sudo certbot certonly --manual --preferred-challenges dns --csr [PATH TO YOUR .P10]Hit enter and we are off! The –manual means that this will run in interactive mode, so there are a few things that will need to be filled in. Provide an email address that will be notified when certificate renewal is coming up, and agree to the terms of service.
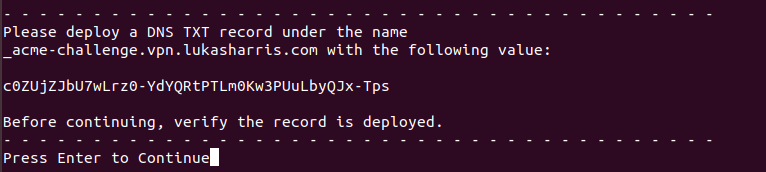
There are a few questions that follow, answer them according to your preferences. After those questions, we are presented with the name of the TXT record we need to deploy, as well as the hash we will insert in that TXT record for verification. Create the TXT record and give it a few moments to propagate. There are a few good DNS propagation checkers available, try one of those and just wait until most of the major servers reflect the change.
As long as you waited long enough for DNS propagation, you should see the success message shortly.
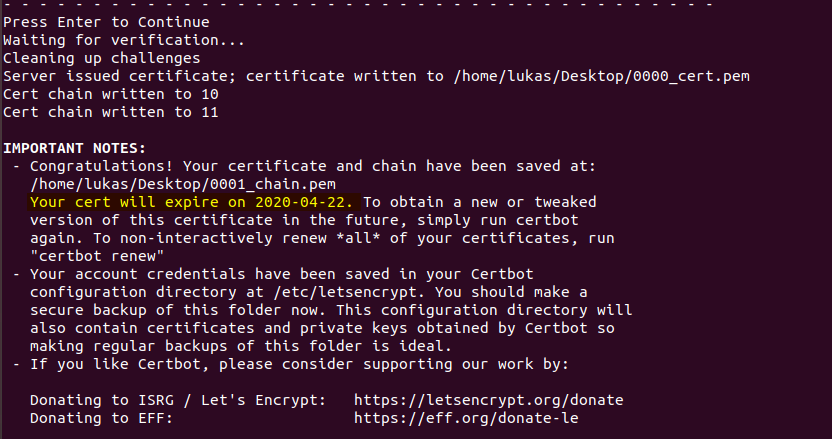
Take note of the expiration date, Let’s Encrypt certificates are not very long lived. It is recommended to have a reminder of some sort to renew the certificate a week or two before it actually expires, so you don’t encounter a lapse in availability. Unfortunately, as of writing this, there is no way to get the certificate renewed on a completely automated basis, mostly because I don’t have an automated way to generate a new CSR on the SonicWall nor a way to automatically upload the signed certificate. Still, this was free…
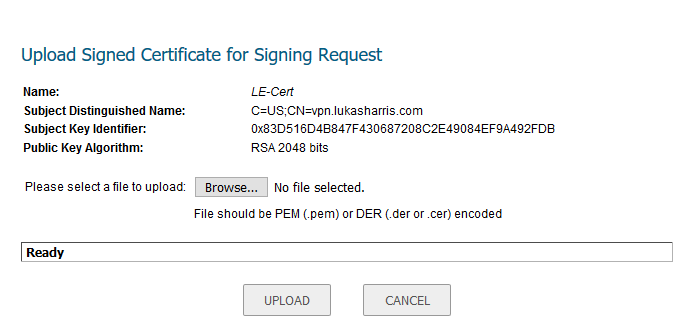
Anyway, we still need to upload this signed certificate to the SonicWall so we can start using it. Take the xxxx_cert.pem file that was generated, as well as the xxxx_chain.pem files that go with it. Log back into the SonicWall (you did log out earlier, right? I mean, that is good security practice after all… 😉 ) and click on the icon that looks like a server with a green arrow; it will be on the far right, next to the download button.
You will be prompted to select the .pem file that was generated by certbot. Click browse to locate the file, and then hit upload.
We are nearly done! You may notice that in the “Validated” column, this certificate is listed as not validated.

This is because the Let’s Encrypt Certificate Authority Root Certificates are not trusted by the SonicWall UTM by default. We will need to upload the requisite certificates to complete the chain of trust. That is where those xxxx_chain.pem files come in. Scroll on down to the bottom of the page and click the import button. Select thr radio button for uploading a CA Certificate, and browse to the xxxx_chain.pem files.
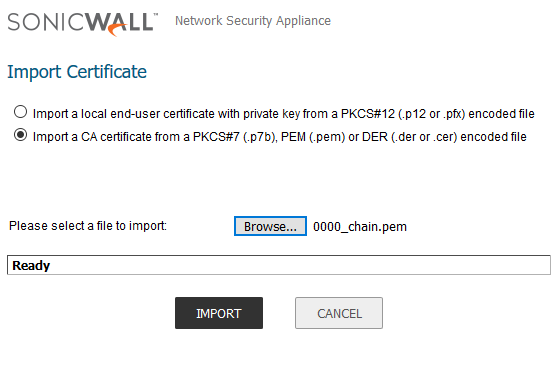
Once you have them all uploaded, you will notice that the Validated status now says “Yes”. If for some reason you are unable to upload those files, or maybe something happened and they were never generated, you can obtain them from the following locations:
https://letsencrypt.org/certificates/
https://letsencrypt.org/certs/isrgrootx1.pem.txt
https://letsencrypt.org/certs/lets-encrypt-x3-cross-signed.pem.txt
https://letsencrypt.org/certs/letsencryptauthorityx3.pem.txt
Save those files as .pem and proceed with the import as detailed above.
Congratulations! You have successfully obtained and uploaded a valid certificate for your SonicWall, from Let’s Encrypt, for the best price possible: free. Now you can use the certificate to secure WAN management and the SSL-VPN service, or really any other place you may want to use it.